

How to Use Dead Eye in Red Dead Redemption 2? One of the best things about Red Dead Redemption 2 is known as the Dead Eye. This unique ability slows down time and helps the player aim better when activated.
In this guide, We will dive deep into the RDR 2 game mechanics to understand the Dead Eye, including all its basic features and how to best use it to your advantage. Taking it a step further, we will also talk about how you can unlock and upgrade new skills on top of the basic Dead Eye mechanic in Red Dead Redemption 2.
Although this game is a great masterpiece, not every aspect of its gameplay is original. This guide will focus on one basic mechanism that was both directly adapted from the first Red Dead Redemption and a well-liked feature of various other Rockstar titles.
Although RDR2’s Dead Eye ability is meant to be a support tool, with the right preparation, you may use it 100% of the time you are engaged in combat and for every shot you fire at your targets.
What is Dead Eye and How to Use It in Red Dead Redemption 2
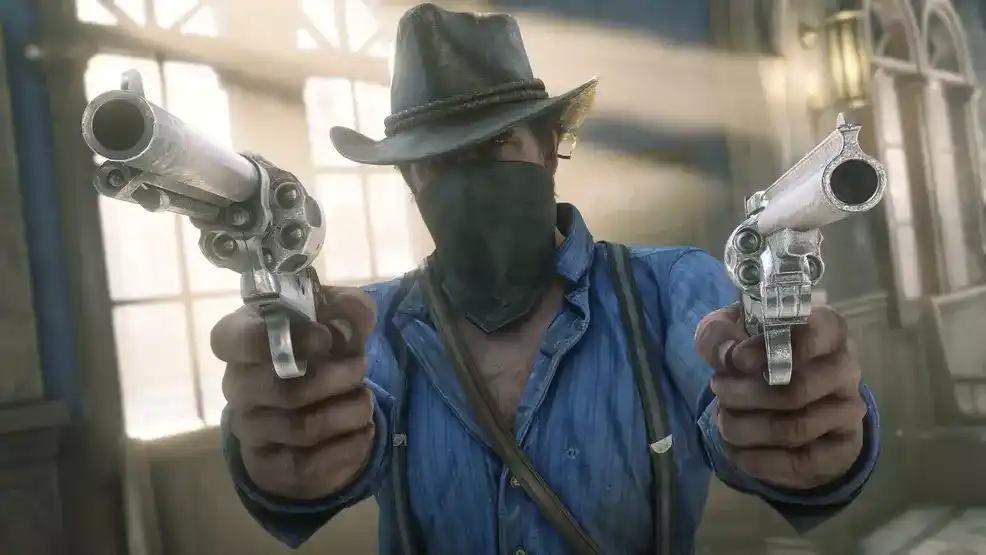
The capacity to slow time down while pointing and shooting a rifle is known as dead eye. You discover it as you progress through Red Dead Redemption 2’s tutorial. Press the Caps Lock key, the mouse scroll on a computer, or the right analog stick on a console while aiming to activate Dead Eye. You can target numerous adversaries at once or aim for particular body sections of your targets. Depending on the degree of the ability.
With the help of this feature, a straightforward shoot becomes a fantastic adventure. Additionally, it might mean the difference between your life and death. In some situations, it can also assist you in completing your current assignment with a gold medal. Rather than a silver or bronze one.
The skill begins easy for you, but with completion, it can be upgraded into something extraordinary. This is accomplished by fulfilling key missions as well as several challenges and accomplishments.
You can increase Dead Eye’s Tier and Level as you progress through the game.
- Dead Eye Tiers provide you access unique new advancements to this mechanic, making you a better gunslinger overall.
- Earn more Dead Eye Levels to increase your character’s Dead Eye duration meter.
Let us now understand how Dead Eye can be improved through Levels. And Upgrades over the course of your gameplay through the next part of this guide.

How to Upgrade and Use Dead Eye Tiers in Red Dead Redemption 2
There are a total of five tiers for Dead Eye that can be upgraded. You unlock each one of them by completing a predefined set of story quests. These are spread throughout the various chapters of the narrative of RDR2.
It is important to note that there is no way to unlock a higher Dead Eye Tier unless the players have completed these missions. Let us have a look at these missions and understand the criteria for each tier upgrade to the Dead Eye.
Tier 1
Requirements to unlock: Chapter 1, Mission: Old Friends
Bonuses to Dead Eye: You can enter Dead Eye and automatically target adversaries in the first tier. At this level, you have no control over the positioning of the “X” markings. At this moment, you can only enter and exit Dead Eye. The targeting process is automatic. And obviously not ideal.
Tier 2
Requirements to unlock: Chapter 2, Mission: Pouring Forth Oil IV
Bonuses to Dead Eye: You can manually target adversaries while in Dead Eye if you unlock this tier. This greatly enhances your gameplay and makes it much simpler for you to get clean headshots.
Tier 3
Requirements to unlock: Chapter 4, Mission: Urban Pleasures
Bonuses to Dead Eye: After firing at your target, you can stay in Dead Eye at this tier without having to label them first. After your character has finished shooting, Dead Eye will let you leave if you mark a target.
Tier 4
Requirements to unlock: Chapter 5, Mission: Fleeting Joy
Bonuses to Dead Eye: You develop into a genuine gunslinger at this point. also hunter! The enemy’s heart and head will now be marked when you enter Dead Eye while they are in view.
Tier 5
Requirements to unlock: Chapter 6, Mission: Goodbye Dear Friend
Bonuses to Dead Eye: You will get access to all of Dead Eye’s features when you reach the fifth and final tier. Along with the previously mentioned advantages from the first four tiers, you will now also be able to view the enemy’s stomach and lungs highlighted in red. You are ready to take everything in one shot.

How to Use Dead Eye in Red Dead Redemption 2
Enter Passive Dead Eye – Click on the Mouse Scroll or Caps Lock
You can enter Dead Eye mode without using its resource by pressing one of these buttons. incredibly helpful when pursuing or seeking for anything or someone. The screen will now brighten and the environment will start to slow down.
Enter Active Dead Eye – With your weapon out Press the Right Mouse Button and press the Mouse Scroll or Caps Lock
Your character will enter what I refer to as active Dead Eye with this combination. You are in the Dead Eye position for combat. The more time you spend there, the more of your Dead Eye resource you are using, and the meter is running out. Your cursor will become red when it is above a target. If not, it is white.
Mark a designated target area on an enemy – Press X
Press X to mark an area of your adversary where your character would fire the gun while Dead Eye mode is activated. Your character will fire many rounds in the same location if you repeatedly press the X button. incredibly effective against legendary animals. You ought to be able to eliminate your target with one shot in just about every other circumstance.
Shoot while in Dead Eye – Press the Left Mouse Button
Your character can fire as many shots as the number of marks you have put on your target(s) by pressing the left mouse button. Without marking, pressing the LMB straight while playing Dead Eye will cause your character to fire one round. You will be able to remain in Dead Eye and carry out further shooting if your Dead Eye Tier is high enough. Otherwise, Dead Eye mode will be automatically ended.
Tips and Tricks for Dead Eye in RDR2
- Your character still sustains damage while in Dead Eye. You were invulnerable in the original game, but neither in this one nor in Red Dead Online.
- Dead Eye is the secret to winning gold medals in missions that call for quick and/or accurate headshots or other specialty shooting.
- When using Dead Eye, if you mark more than one target, your character will move from high-shoulder to hip firing. You can fire your guns far more quickly and inaccurately if you shoot from your hip.
- You can fire a non-professional gunslinger’s gun out of their hands if you’re dueling with them (for example, a drunken fool or a nobleman who feels insulted by whatever you may have said or done to him). You can do that even when there are no fights.
- A mark on your target does not guarantee that you will always strike it exactly. You risk missing if something blocks your line of sight or if, during dead eye, your target unexpectedly moves for any reason. Several times when I first tried to fire from cover, this thing happened to me. I eventually realized that this cover not only protected me but occasionally also deflected some of my shots.
- In RDR2, you can utilize Dead Eye to see more clearly in low light. When you are in a dark, deep cave or house and are unable to see your attackers clearly in front of you, this is quite beneficial.
- The Dead Eye bar (or meter, if you prefer) can be refilled in two different ways. Shooting without using Dead Eye is one approach. The other is to ingest the many tonics that are offered in the game. They can be made, purchased, or looted.

Conclusion
Dead Eye in Red Dead Redemption 2 is somewhat like an omnipresent support that can have a huge impact on your gameplay. Although it is possible to take on hardened enemies without a fully upgraded Dead Eye, we strongly recommend you get ahead of the game by upgrading your Dead Eyes with the help of this guide on Gameophobic.