

The Last of Us Collectibles Locations: The artifact collectible places in The Last of Us Part 1 are essentially notes, posters, and other items that give the world a little extra lore. For anyone seeking an additional plot, it is well worth reading, and it is crucial for those attempting to complete the game entirely.
In The Last of Us Part 1, artifacts are some of the things that are more difficult to locate. They serve as background filler and offer nothing to the scene, and they are frequently placed out of the way so as not to obstruct anything you might truly need. We’ve included every The Last of Us Part 1 artifact location below so you can find them all.
Every Artifact Collectibles Locations in the Last of Us
There are 86 total artifact collectibles in The Last of Us Part 1 scattered out among the game’s twelve levels. Although some are provided to you automatically, so the number is a little lower. The TLOU Remake splits them formally as follows:
- Hometown: 0
- The Quarantine Zone: 7
- The Outskirts: 9
- Bill’s Town: 11
- Pittsburgh: 17
- The Suburbs: 10
- Tommy’s Dam: 2
- The University: 9
- Lakeside Resort: 10
- Bus Depot: 4
- The Firefly Lab: 4
- Jackson: 0
Remember that some of them are given to you in cutscenes and still contribute toward your collection, so you don’t need to discover them all. Some simply “appear” in your inventory between levels and only require that you glance at them to “discover” them. This is demonstrated in the Lakeside Resort level, where you will begin with a large number of new items in your backpack that you have never seen previously but that the characters have nonetheless gathered.
In light of this, we’ll go through every artifact listed below, level by level, and show you The Last of Us Collectibles Locations. The Last of Us Part 1’s Hometown and Jackson levels will also be skipped because there is nothing to be found there.
The Quarantine Zone Collectibles Locations
This covers the first real chunk of gameplay, from the time skip where Joel is playing in the Washington military zone through waiting for night to fall while sleeping at the safe home.
Beyond the Wall
Artifacts #1-2: Boston Q.Z. Map, Military Pamphlet
Once you have your bag, these are automatically in Joel’s possession.

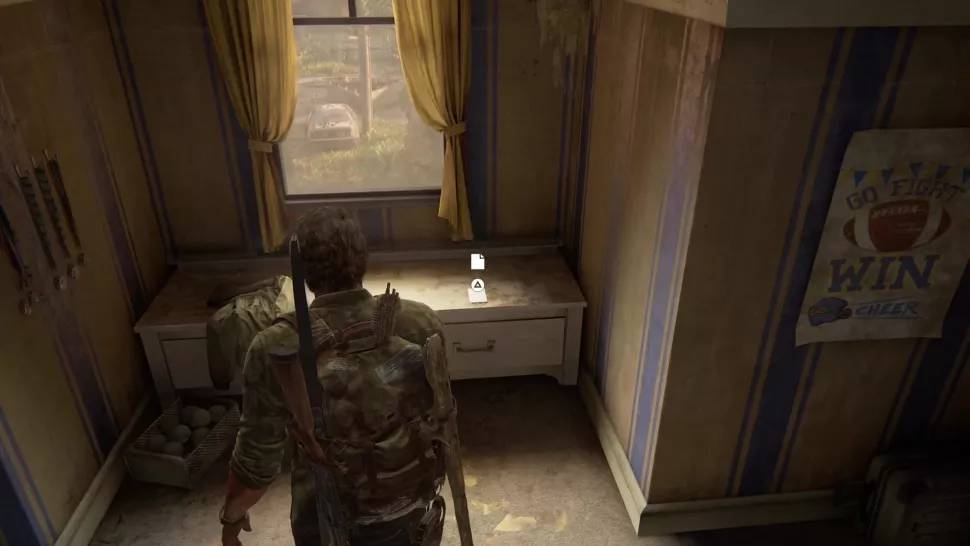
Artifact #3: Note to Brother
You’ll ascend some steps right after your initial run-in with the infected. Turn left and open the door before leaving the building. You’ll discover a letter in this room on the table beside the window.
The Slums
Artifact #4: Drafting Notice
This difficult to locate collectible will be lying on the ground next to a table right after exiting the bus.
Artifact #5: Wanted Poster
Look up from where you picked up the previous item; this poster is affixed to a storage unit a few steps past the previous one.
Artifact #6: Warehouse Key
While learning about stealth kills, you’ll acquire this. The thug will drop the key on his body once you enter the office room and kill him.
Artifact #7: Shipping Manifest
Joel will naturally jump down the ledge and into shelter if you first see Robert while blending in from a distance. From here, turn right to find this item behind the seagull-adorned blue dumpster and next to the railing.

Artifact #8: Dock Notes
Just before the last one, turn right at the forklift as you enter the warehouse and proceed past the boat in the dry dock. Another relic can be found in this dead end behind another blue trashcan.
The Outskirts Collectibles Locations
The second major chapter of the game starts when you arrive at the safe house at night and lasts until you take the subway out of the Capitol Building.
The Outside
Artifact #9: Tess’ List
Before you leave the apartment after the sequence in which you sleep there, turn around and look behind you. You can pick up a valuable artefact by the lantern.
Take the elevator powered by the generator down and turn straight away. Grab the map that is located between two boilers and a pallet because it is dark below.
Artifact #10: Patrol Routes Ma
Take the elevator powered by the generator down and turn straight away. Grab the map that is located between two boilers and a pallet because it is dark below.
Downtown
Artifact #11: Evacuation Leaflet
Later, Tess and Joel will dispute until she convinces him to complete this task after they have escaped the military through the storm drains. After that, ascend the collapsed bridge to the main road; this relic lies up ahead, on the right side of the road, next to the traffic signal.

Artifact #12: Field Ops Log
You’ll eventually find yourself inside a crooked building, and as you climb the stairs, you’ll pass one of many dead troops. He has his notes next to him.
Artifact #13: Firefly Map
After obtaining the revolver, you must descend all the way down the building’s rubble into a collapsed subway. A body with a molotov is in front of you; turn right from there and proceed to the steps beyond to find another person holding an object.
Artifact #14: Note to Derek
The next sector is packed of clickers and contains shops on both sides. You can find this relic, which serves as a secure code for The Last of Us, in a drawer behind the counter in the store if you enter from the left.
Museum
Artifact #15: Medical Pamphlet
When you reach the other side of the semi-truck after climbing over it with a mobile display unit, turn around right away to look inside for this note.

The Capitol Building
Artifact #16: Firefly Orders
You’ll arrive at the top of some stairs after scaling roofs and Tess pointing out the nearby Capitol Building in a cutscene. After reaching the bottom, turn around right away to find this close to a dead body.
Artifact #17: Smuggler Note
You’ll investigate a flooded subway following your escape from the Capitol Building. Swim ahead; there’s a platform on the left with a corpse and a note after you’ve evaded two troops.
Bill’s Town Collectibles Locations
Unsurprisingly, Bill’s Town includes all that occurs there, from your entrance in the woods to your hasty getaway in a car. You’ll need to do more exploring in this location since it’s a little more open than anywhere else to find what you’re looking for.
The Woods
Artifact #18: Pills Note
You will descend to a little building with a shed in front of it and a sleeping clicker inside after using a plank bridge to pass the gate. This note is on the floor of the upper office if you enter the building through the steps.

Artifact #19: Note to Bob
After Ellie unlocks the gate for you, turn right and proceed to the barricade at the end of the main street. Another relic is tangled up in the barbed wire.
Artifact #20: Perimeter Note
The Marquis Music Store is located on the left side of main street when looking down the street. This note can be found on a desk in the back room once you enter.
Artifact #21: Note to Rachel
You will eventually descend to street level once more and crouch under a wire after obtaining the bow and scaling the roofs. The door Ellie is concerned about is immediately on the left; above, on the right-hand table, is a message.
Safehouse
Artifact #22: Bill’s Map
Once you are inside Bill’s safehouse, which was formerly a pub, search for the stack of crates close to the bar. This is on top of them, and if you want it, there is also the first The Last of Us Training Manual in this.
Artifact #23: Fences Note
Don’t visit Bill just yet. The following artefact can be found on top of a small table if you turn around and enter the cramped back chamber.
Artifact #24: Hunters Note
After leaving the pub, turn right at the top of the stairs to enter a kitchen. This is on a little table inside.
Artifact #25: Bombs Note
After providing you with firearms and a nail bomb, Bill will lead you to another safehouse inside of a church. To access Bills’ room on the top floor of the church, turn right just before the exit window. Another object is on his desk.
Graveyard
Artifact #26: Boy’s Diary
You’ll go to a somewhat safe house by hopping a truck and jumping out of a treehouse into a garden. Enter the building, go upstairs, and turn right. You can find an artefact close to the window by making another right inside this kids’ room.
High School Escape
Artifact #27: Note from Frank
Take some time to look around the house before pushing the car. This is on top of a desk in the back bedroom.
Artifact #28: Note from Frank (Crumpled)
Speak to Bill in the garage after obtaining the Note from Frank. After reading the note, he will furiously toss it on the ground. The note can then be picked up once again because it is a collectible.
Pittsburg Collectibles Locations
Pittsburgh is by far the largest part of the game, including the ambush and decoy by hunters, the hotel, the armored automobile, as well as Henry and Sam’s nocturnal escape. You can finally proceed to the next section of the instruction once you witness Joel and Ellie jump off a bridge.
Alone and Forsaken
Artifact #29: Siphon Hose
Joel will receive this from Bill at the conclusion of the prior chapter.
Artifact #30: Tourists Manifest
Ellie will assist you in unlocking a metal door so you can enter a gruesome garage after you escape the initial ambush. There is an artefact in this area, on the right side of the chamber. You should get one of The Last of Us’s tools as well.
Artifact #31: Ambush Map
To access the little chamber with a workbench for The Last of Us weapon upgrades, ascend the stairs and continue straight down the corridor to the opposite door. When you enter, turn around to see this pinned to the wall.
Artifact #32: Lost Hill Note
Hop over the right sandbag mound when you arrive at the military checkpoint (the one near the graffiti that Ellie points out). If you’re looking for a well-hidden item, check in the security booth.

Artifact #33: Traitors Flyer
When you pass through the turnstile, a sizable covered area will be in front of you. Turn 180 degrees and move in its direction to see this pasted on the wall.
Artifact #34: Abandon Zone Note
This message is sitting on a counter in the employee kitchen, which is located in the front of the bookstore on the ground floor on the right.
Artifact #35: Applicant Checklist
Before climbing the stairs to the top floor of the bookstore, go to the front of the establishment and look behind the stairwell there, on your right as you pass through the main doors (or your left if you’re facing them from the rear). Underneath, on a shelf, is another relic.
Artifact #36: Lost Areas Map
A tiny cafe and a shiv entrance are located in the upper floor’s top corner of the bookstore. Enter the building to locate a tonne of supplies and this object.
Artifact #37: Mother’s Letter
Continue until a brief cutscene featuring hunters walking a plank appears. Right away turn left to find another shiv door that is identified by a red “X” and has a blue awning over it. As soon as you enter, an artefact will be perched atop a chair in front of you.
Artifact #38: Stash Note
Hang left toward this underwater storage facility as you swim through the green muck to assist Ellie in getting to the plank. The relic is on a desk after you ascend the stairs and turn around to the right in the chamber.
Hotel Lobby
Artifact #39: Note to Staff
Turn right after avoiding the broken stairway with the ladder. To get to an open suitcase in front of some double doors, you can squirm around the perimeter of this area. That suitcase has this note.

Artifact #40: Hotel Keycard
This is located close to where you battle the Bloater. After eliminating all the infected, use the stairway to get to the higher floor. A security room can be found by following the rooms as they turn to the right. This item is positioned here close to a row of televisions. (This is required since it unlocks your escape door.) We created a whole page on The Last of Us keycard and where to get the generator for additional information on this challenging topic.
Financial District
Artifact #41: Fireflies Note
Clear out all the thugs by fighting your way through the plaza where Joel offers Ellie the weapon. There will be a structure selling “Don Fiocchi Subs” on the right. This object can be found on the floor in the walk-in freezer in the back room after entering.

Artifact #42: Final Attack Note
After ascending some stairs, you’ll come across two patrolling hunters up ahead. On the right, there is a long office; at the very end, hidden behind a desk, lies this relic.
Artifact #43: Mob Attack Note
Enemies will be perched on a ledge of the Delta Direct building as you turn a bend. Take the steps up and enter the building through the left door, which is the one under the sign. When you get to the top floor, look behind the front desk for a secret artefact.
Artifact #44: Truck Note
You’ll pass the Ration Depot on your way out of the neighbourhood. You can find an item in the main waiting area by entering and walking straight past the first desk.
Escape the City
Artifact #45: Trial Note
Once inside Henry’s safehouse, turn right to enter a boardroom where this is located in the far corner next to a table.
The Suburbs Collectibles Locations
The Suburbs chapter really begins before you get there because you’ll wake up on a beach and have to first make your way through some unsettling sewers. After a sniper-filled passage and a tense cutscene, the chapter comes to a close.
Sewers
Artifact #46: Boat Note
Ellie will point out a destroyed boat when you cross the beach after getting out of the car on the bridge. Open the bridge after boarding to find this right away.
Artifact #47: Sewers Note
Make a right at the fork after entering the sewer to come upon a locked gate. Ellie will unlock the gate if you send her via the neighbouring vent. This can be found indoors on a table.
Artifact #48: Trading Note
Open the door in the water-filled room that is adjacent to the raft. Remove the infected who is dozing inside, then enter the room’s back corner. There are several supplies as well as this relic to be found.

Artifact #49: Rain Catcher Note
After obtaining the Shorty, a favourite weapon in The Last of Us, take out the tiny group of infected you come across and turn right. You can locate another item atop a covered table in this area filled of rain barrels.
Artifact #50: Cornered Note
Just before the rain-catcher room, up the curving stairs, and a blue door will be on your left. Open it, and you’ll find another item next to a dead body in the back left corner.
Artifact #51: Kid’s Drawing
When separated from Ellie and Henry, this is located in the first spacious room. You’ll pass through the “classroom” that Eric refers to before leaving the room. This can be found on the classroom’s bookcase.
Suburbs
Artifact #52: Looting Note
Just before the rain-catcher room, up the curving stairs, and a blue door will be on your left. Open it, and you’ll find another item next to a dead body in the back left corner.
Artifact #53: Father’s Note
When separated from Ellie and Henry, this is located in the first spacious room. You’ll pass through the “classroom” that Eric refers to before leaving the room. This can be found on the classroom’s bookcase.

Tommy’s Dam Collectibles Locations
Tommy’s Dam is divided into two sections: the ranch where you travel on horseback for a rescue, and the dam itself, where you get a tour and some action to follow.
Hydroelectric Dam
Artifact #56: Power Plant Map
Hang left to locate a tiny security facility just before you approach the power plant itself, after utilising the barrier as a bridge and as you pass the yellow bulldozer. Inside, a map is attached to the wall.
Artifact #57: Plant Schematics
Stop by the same table where the engineers were studying the plant blueprints and where there were several The Last of Us supplements later, while you are inside the dam and on your way outside during the bandit onslaught. They aren’t using the schematics right now, so you can take them.
The University Collectibles Locations
Everything that occurs inside the walls of UEC is definitely part of the University, a larger chapter. The chapter begins with you riding up on horseback and ends with someone suffering a serious injury during a conflict.
Go Big Horns
Artifact #58: Sniper’s Nest Log
Once you have entered the campus grounds, turn right into the loading bay with the Flamethrower and proceed a short distance until the first barrier you must have the horse jump. From there, ascend the steps to the top floor and use the balcony to leave. This artefact and several supplies can be found there.
Artifact #59: Wall Panel Note
Later on, you’ll come upon a gate that requires electricity to operate. This plainly stated justification for why it is busted appears on the wall to its left.
Artifact #60: UEC Campus Map
You will later encounter another depowered gate and will need to squat through a partially blocked opening. Another map to put in your pocket is just ahead.
Artifact #61: Student’s Journal
Proceed upstairs and enter the second dorm room on the left after that. One of the drawers on the owner’s desk contains their journal.
Artifact #62: Newspaper Clipping
When you return to the second level of the dorm after dealing with the bloater and clickers downstairs, turn right out of the stairwell and go through the first door on your right (Room 205-B). To find this note, turn left inside the dormitory room.

Science Building
Artifact #63: Office Recorder
At the top of the stairway in the scientific building, turn left. You’ll see two doors there—one closed, the other open. This relic can be found on a table close to a framed painting by entering the opening one on the left.
Artifact #64: Fungal X-Rays
Make a left after leaving the tented hallway. These can be found on a counter close to the window.
Artifact #65: Lab Recorder
The monkeys will reappear in the very next room. This object is also on a sizable table in the centre of the room.
Artifact #66: Firefly’s Recorder
Joel will pick up a recorder when you proceed into the following room, as shown in a cut sequence. This is added to your collection automatically.
Lakeside Resort Collectibles Locations
Despite being a lengthy chapter, The Lakeside Resort has extremely few items because you spend most of it playing as Ellie rather than Joel. But now that you have access to Ellie’s backpack, there are many, many “new” trinkets to look back on. This chapter begins with a cuddly rabbit and finishes with a boss battle and a bar fire.
The Hunt
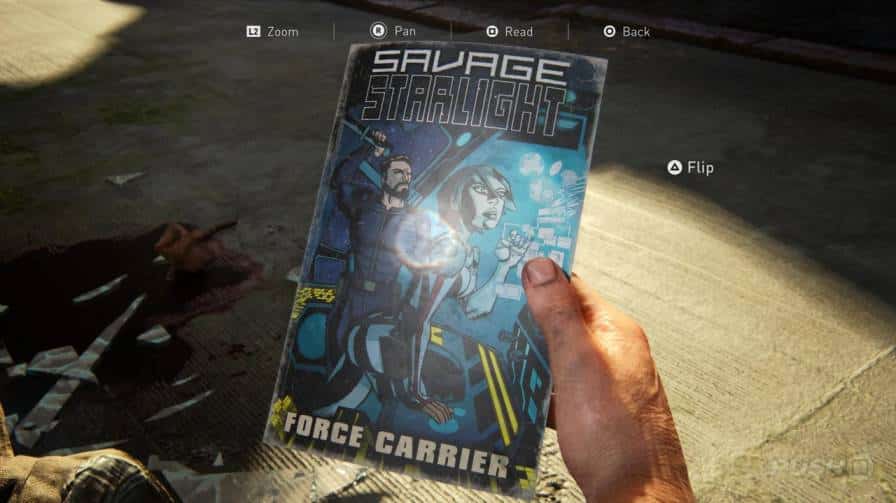
Artifacts #67-75: No Pun Intended, No Pun Intended: Volume Too, To Get to the Other Side!, Riley’s Pendant, Sam’s Robot, Walkman, Switchblade, Note from Mom, Joel & Sarah Photo – Collectibles Locations
When the story begins, Ellie will already be in possession of these.
Important: Make sure you examine each of these items in Ellie’s backpack, turn them over if you can, and pay attention to Ellie’s comments in full so that they all record as having been found.

Artifact #76: Lake Resort Map
Joel will get this by default whenever you regain control of him following Ellie’s battle with David, a long time after the last one.
Cabin Resort
Artifact #77: Ellie’s Backpack
Joel will close a door behind him as you hunt for Ellie, and you can pick this up in a cut scene.
Artifact #78: Meat Ledger
From the shelf where Ellie’s backpack is, turn right to find another relic in the same room on a different shelf.
Bus Depot Collectibles Locations
Even though the chapter is titled “The Bus Depot,” only a small portion of it really takes place there. Instead, this section covers everything from Joel and Ellie fighting the current when they unintentionally plunge into rushing water until their arrival in Salt Lake City on the freeway.
Highway Exit
Artifact #79: Family Photograph
You’ll drive past an RV on the highway at the beginning of the chapter. This can be found on a counter inside.
Artifact #80: Note to Wife
Stick to the left wall to get to a collection of luggage when you turn left inside the bus depot itself. This object can be found inside a suitcase that is open.

Artifact #81: Salt Lake Q.Z. Map
Go straight ahead to the farthest medical tent when you arrive at the triage area outdoors. This is indoors, sitting atop a table.
Artifact #82: Joel & Sarah Photo
Joel will be informed by Ellie that she “has something for him” just before she exits the triage. To get the picture, turn around and select to chat with her.
The Firefly Lab Collectibles Locations
The Firefly Lab contains the last artefact items and is where you experience everything that happens in the hospital before getting in the car, therefore despite the fact that it isn’t the final level officially.
The Hospital
Artifact #83: Surgeon’s Recorder
After overcoming the adversaries, you will enter the West Wing and ascend some stairs, leaving a path of obstruction in your wake. This will be on a counter in front of you when you come out of the stairwell.
Artifact #84: Marlene’s Recorder 1
Make two rapid right turns from the stairwell entrance to a little room. Another artefact recorder is on a desk inside.

Artifact #85: Marlene’s Journal
A sizable quarantine tent may be found by turning around the passageway. Enter to discover a different artefact on a table.
Artifact #86: Marlene’s Recorder 2
Make a right at the first door and open it as you proceed down the last corridor to Ellie’s operation room. Another artefact, the final genuine artefact collectible in the entire game, may be found here on a table close to the window.
These are all of the Collectibles Locations that can be found in the Last of Us along with the location to each one of them.
Also, read How Long is the Last of Us Remastered.